Web-Cart Multi-Vendor E-Commerce Marketplace
The only software need to run your multi-vendor ecommerce marketplace.
Email: lizarweb@gmail.com
Website: web-cart
Email: lizarweb@gmail.com
Website: web-cart
Webcart is a powerful Multi-Vendor Shopping Cart Software. It is a platform building an online store. It accepts the customer's payment and organizes the distribution of that information to the merchant, payment processor and alternative parties.
Following are the core requirements for Web-Cart:
For installation of Web-Cart, please follow the up-to-date installation guide:
Web-Cart Installation on Shared HostingTo turn off debugging, open "config/app.php" and search for this line:
'debug' => env('APP_DEBUG', false),
Change it to:
'debug' => false,
and so on.
To set environment to production, open "config/app.php" and search for this line:
'env' => env('APP_ENV', 'local'),
Change it to:
'env' =>'production',
and so on.
You can access business settings from admin panel. For that, you need to login with an account having permission to access business settings. Next, you can navigate to 'Manage' > 'Settings' > 'Business.
"App Name" – will be used at the time of sending emails.
"Timezone" – represents application's timezone.
"Currency" – this should be set onl
y one time. Also, currency conversion of your product's price will not be done if changed. For this reason, this should not be changed.SEO for Home Page:
"Meta title", "Meta description", "Meta keywords"
"Google Analytics Script"
Note: If "Meta title" is unset, then "App Name" will be used.
Navigate to 'Manage' > 'Settings' > 'Overview'. Here, you will find:
Store:
"Enable Maintenance Mode" – if maintenance mode is enabled, then only staff with any role can access admin panel. Also, you can login using using http://web-cart.com/login.
"Contact Email" – to be appeared in header.
"Contact Number" – to be appeared in header.
"Logo Name" – to be appeared in top navigation.
"Site Logo"
"Favicon"
"Social Links" – to be appeared in footer.
Tawkto Live Chat Widget: - This is a live chat widget. You can get the widget code from here.
Tax / Shipping:
"Tax Rate (in %)" – applies to total order value.
"Shipping Cost" – applies to total order value.
"Shipping Cost applies below price" – applies only if total order value is below this price value.
For example:
If total order value is 200, "Shipping Cost" is 100 and "Shipping Cost applies below price" is 499, then total will be 300 after applying shipping cost.
Admin Panel:
"Enable Table Data Export" – allows data-tables to be exported to PDF, CSV, Excel, Print etc.
Google Recaptcha:
"Enable Google Recaptcha" – enable "Google Recaptcha" validation when signing up.
Also, you will need to provide "Public Key" or "Site Key" and "Private Key" or "Secret Key".
Google Map: enable "Google Map" at the contact form.
You can either add an embedd code for google map or you can get the API key from here, enter the location of store.
Here, you can specify the minimum amount which the vendors must earn before they can request for payouts.
Template Layouts:
Here, you can customize email templates for various emails such as for "Order Placed", "Payment Failed", "Order Processed" etc.
Email Configuration:
Select from "SMTP" or "Mailgun" as email carrier.
If you select "Mailgun", then you will need to provide "Mailgun Domain" and "Mailgun Secret".
If you select "SMTP", then you will need to provide "Mail Host", "Mail Port", "Mail Encryption", "SMTP Server Username" and "SMTP Server Password".
For example:
If you want to use Gmail as your email carrier, then "Mail Host" will be "smtp.gmail.com", "Mail Port" will be "587", "Mail Encryption" will be "tls", "SMTP Server Username" will be your gmail account's email address and "SMTP Server Password" will be your gmail account's password. Also, you will need to enable less secure app from:
https://myaccount.google.com/lesssecureapps?pli=1.
You can send a test email to check if it works correctly.
Template Layouts:
Here, you can customize SMS templates for various sms such as for "Order Placed", "Order Processed" etc.
SMS Configuration:
Currently, Web-Cart supports these SMS providers: Nexmo, Textlocal and MsgClub.
Here, you can enable or disable SMS and select SMS provider. Also, you will need to provide appropriate API Key and Secret Key of the SMS provider.
You can send a test SMS to check if it works correctly.
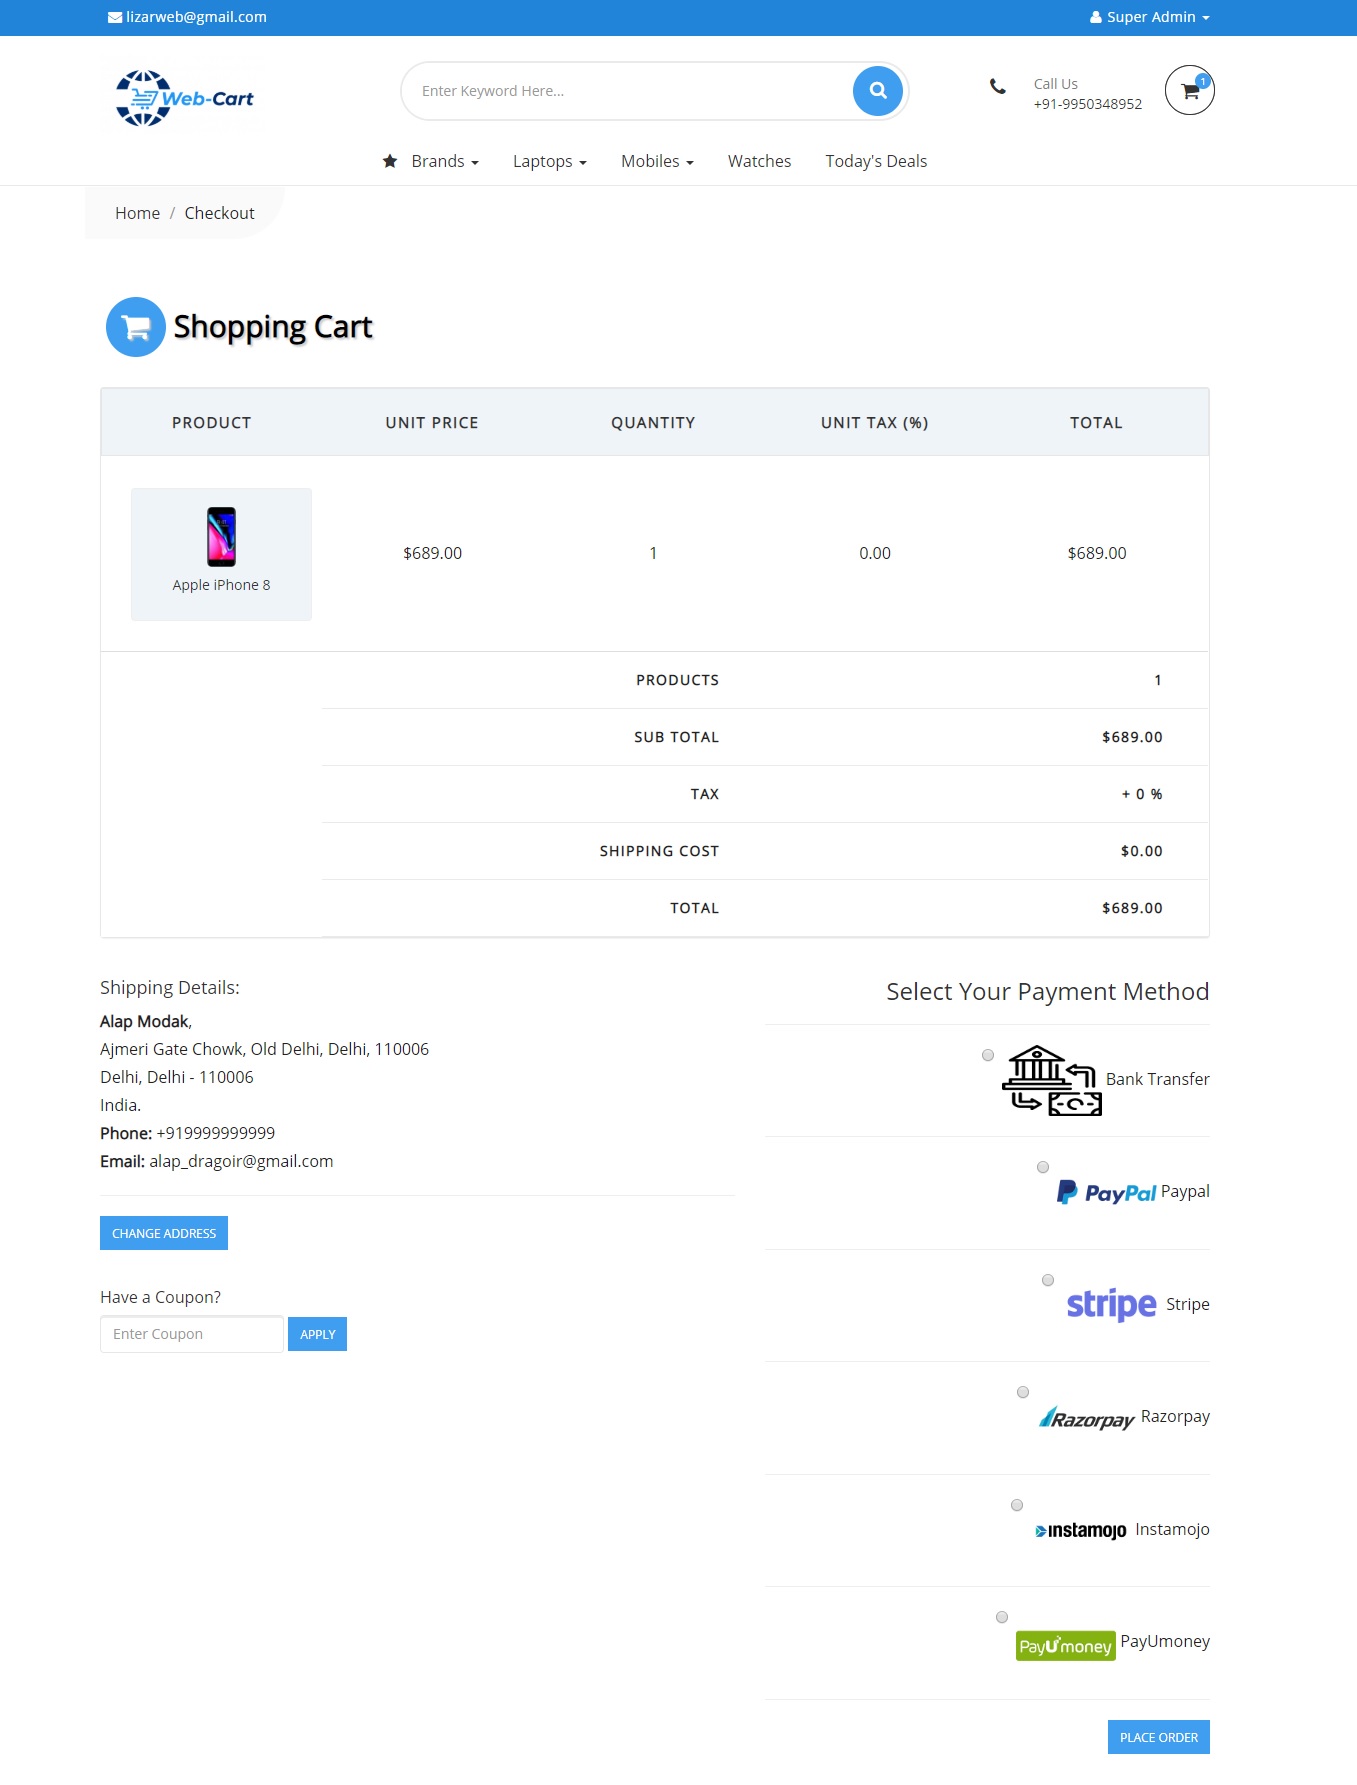
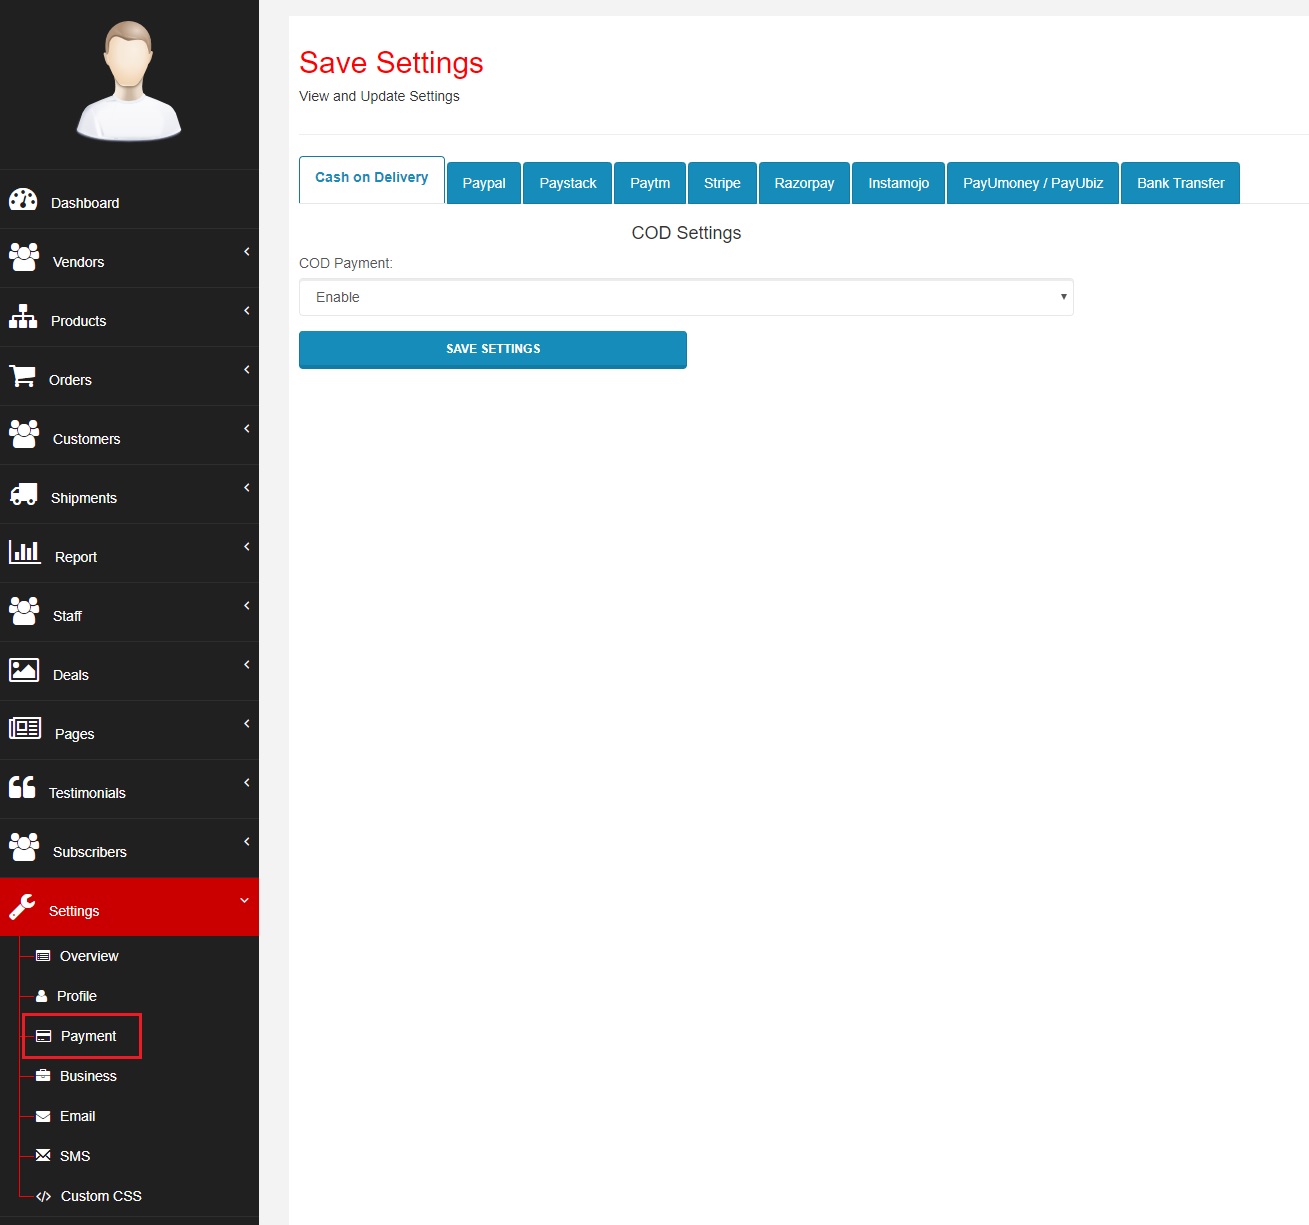
Webcart supports these payment methods: Cash on Delivery (COD), PayPal, Stripe, Razorpay, Paytm, Instamojo and PayUmoney/PayUbiz, Paystack and Bank Transfer. Also, you can enable or disable them.
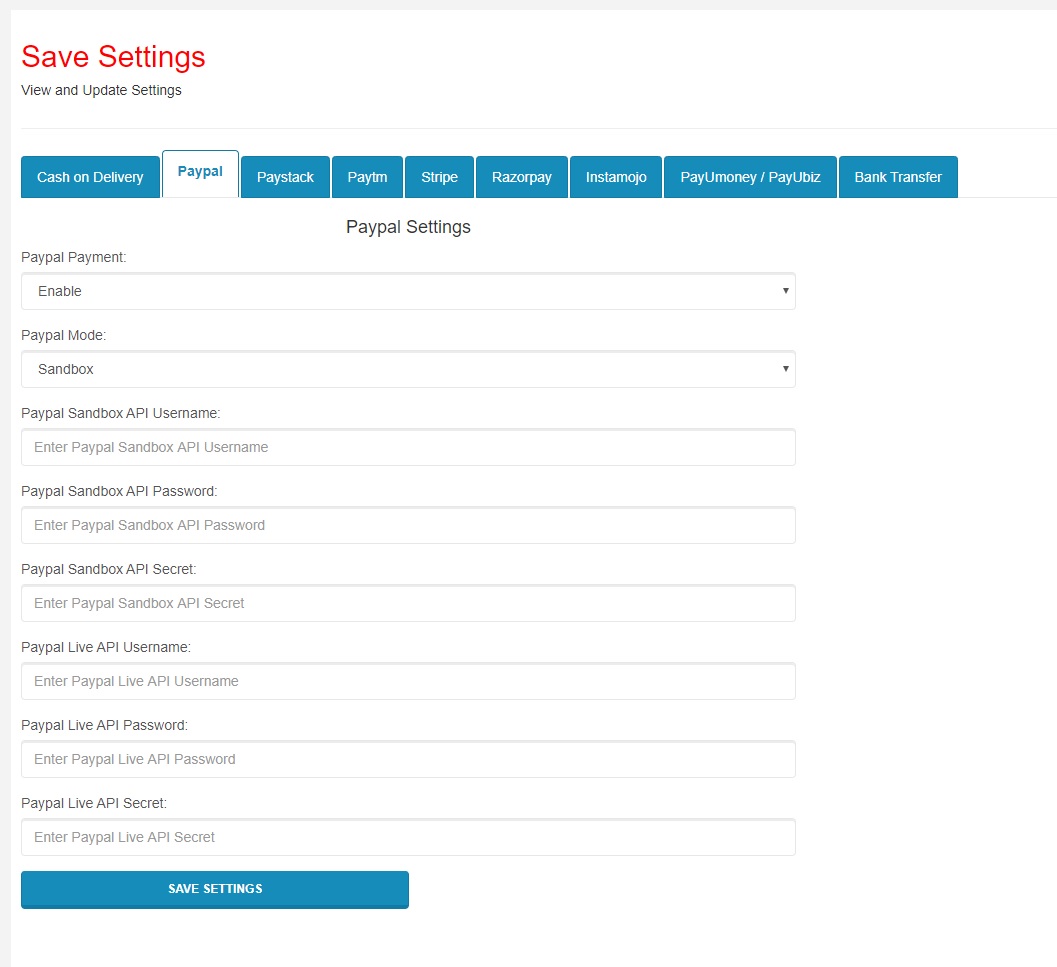
PayPal:
"PayPal Payment" – Enable / Disable PayPal Payment Method.
Also, you will need to provide "API Username", "API Password" and "API Secret".
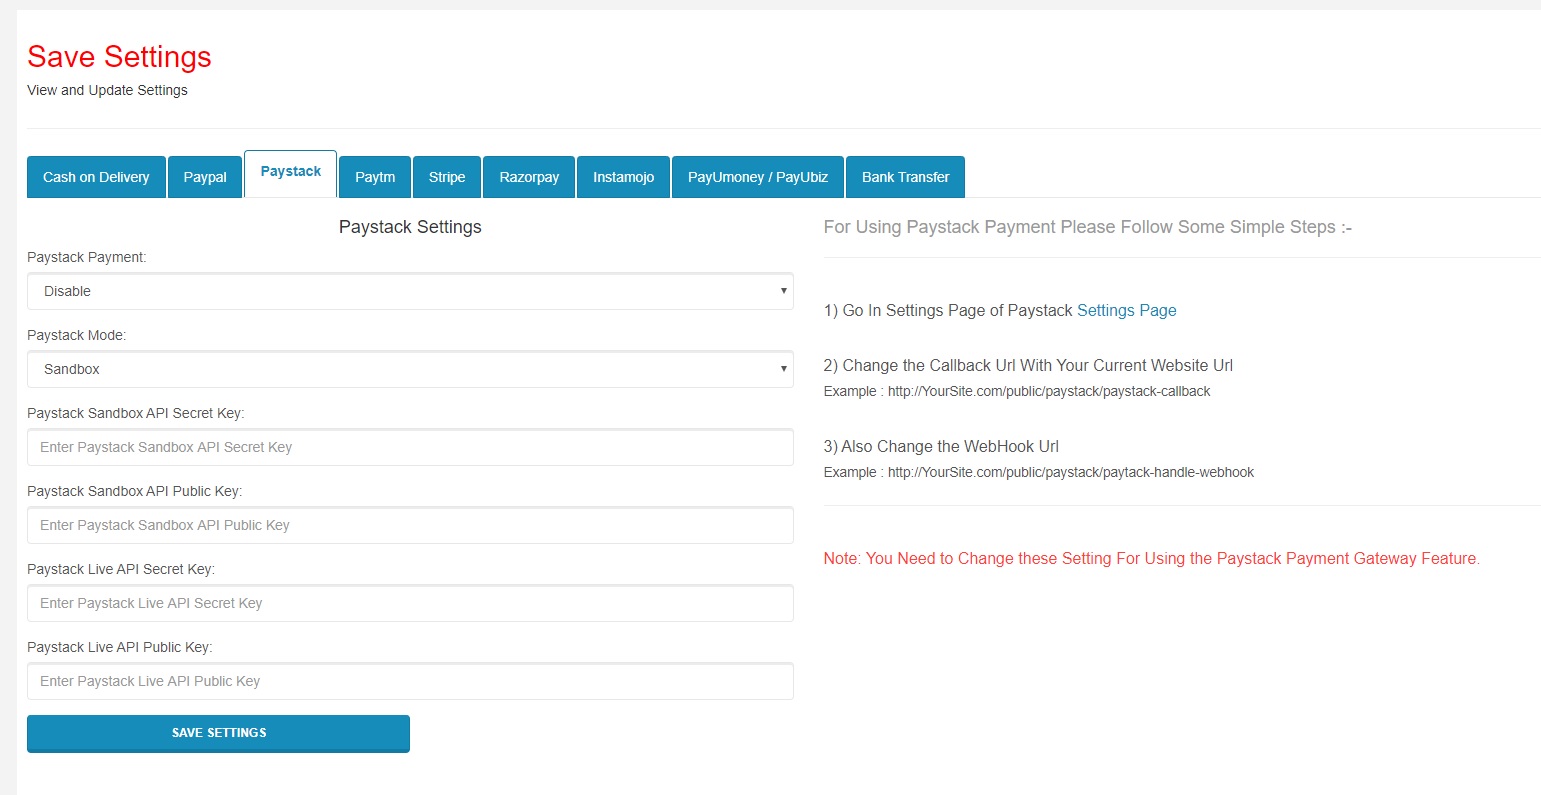
Paystack:
"Paystack Payment" – Enable / Disable Paystack Payment Method.
Also, you will need to provide "Paystack API Secret Key" and "Paystack API Public Key".
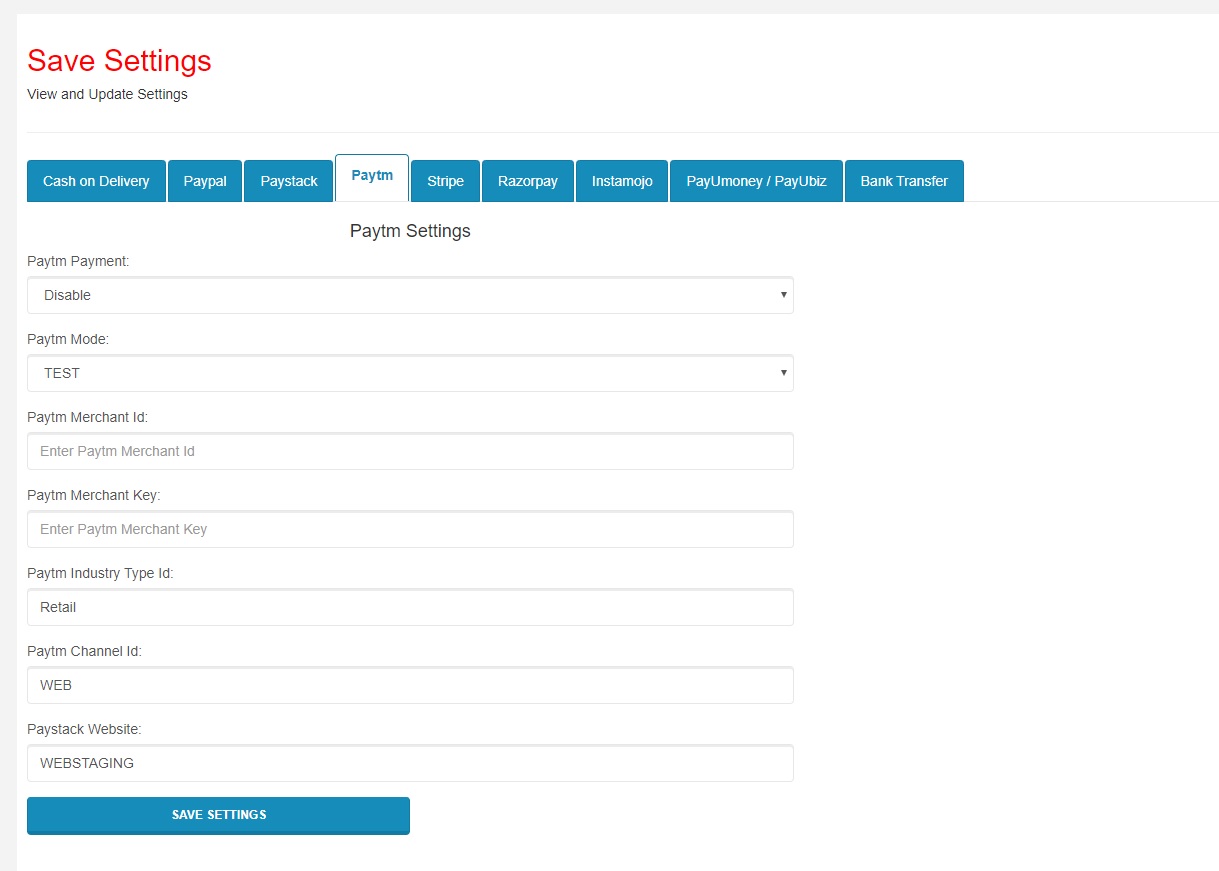
Paytm:
"Paytm Payment" – Enable / Disable Paytm Payment Method.
Also, you will need to provide "Paytm Merchant Id", "Paytm Merchant Key", "Paytm Industry Type Id", "Paytm Channel Id", "Paytm Website".
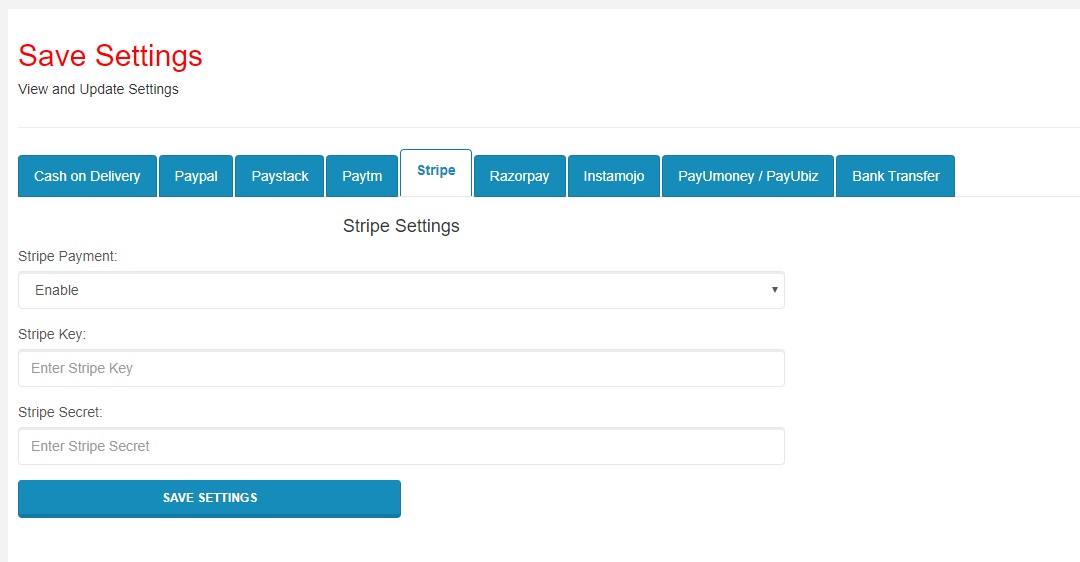
Stripe:
"Stripe Payment" – Enable / Disable Stripe Payment Method.
Also, you will need to provide "Stripe Key" and "Stripe Secret".
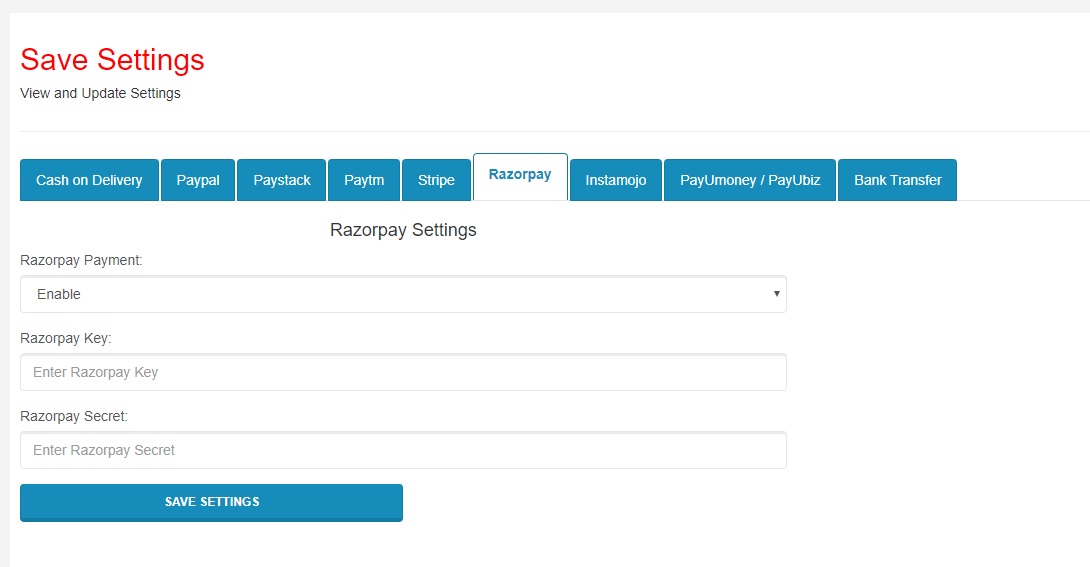
Razorpay:
"Razorpay Payment" – Enable / Disable Razorpay Payment Method.
Also, you will need to provide "Razorpay Key" and "Razorpay Secret".
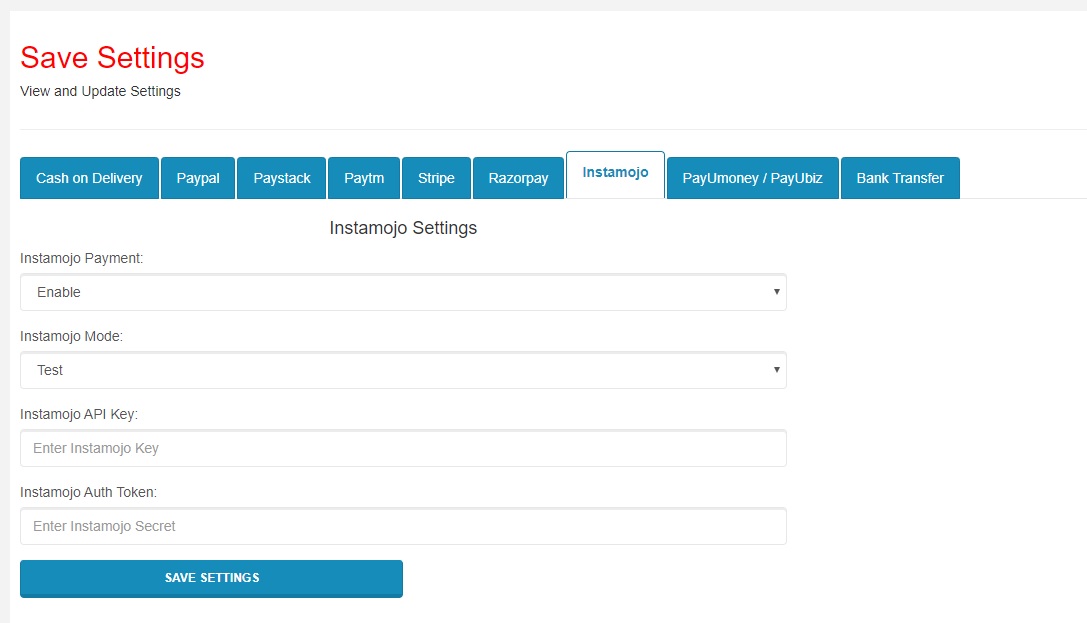
Instamojo:
"Instamojo Payment" – Enable / Disable Instamojo Payment Method.
Also, you will need to provide "Instamojo API Key" and "Instamojo Auth Token".
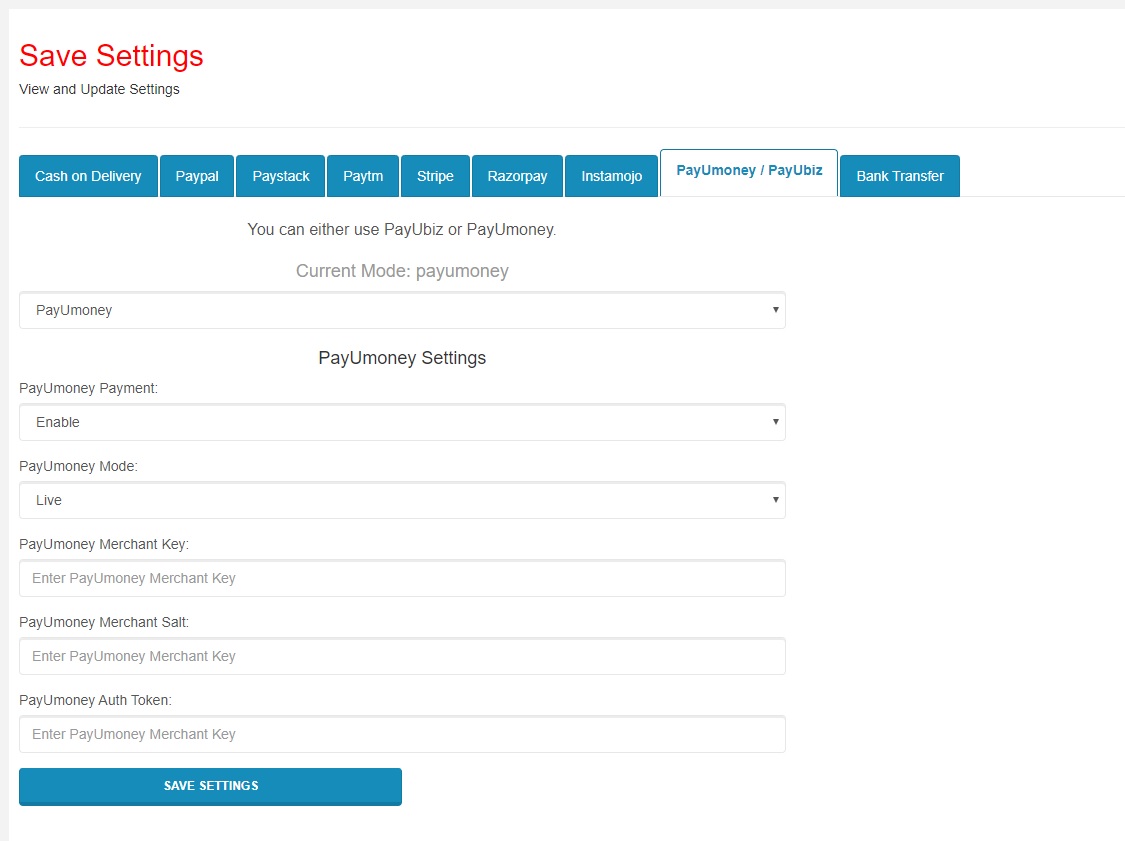
PayUmoney / PayUbiz:
"PayUmoney / PayUbiz Payment" – Enable / Disable PayUmoney / PayUbiz Payment Method. Also, for PayUmoney, you will need to provide "PayUmoney Merchant Key", "PayUmoney Merchant Salt" and "PayUmoney Auth Token". And, for PayUbiz, you will need to provide "PayUbiz Merchant Key" and "PayUbiz Merchant Salt".
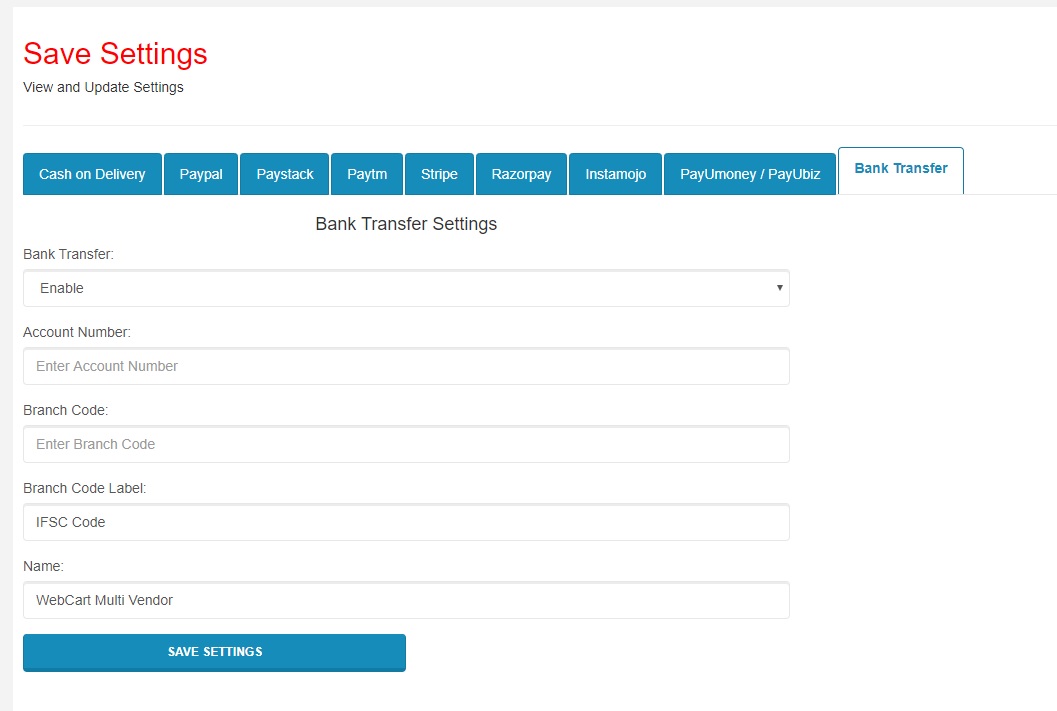
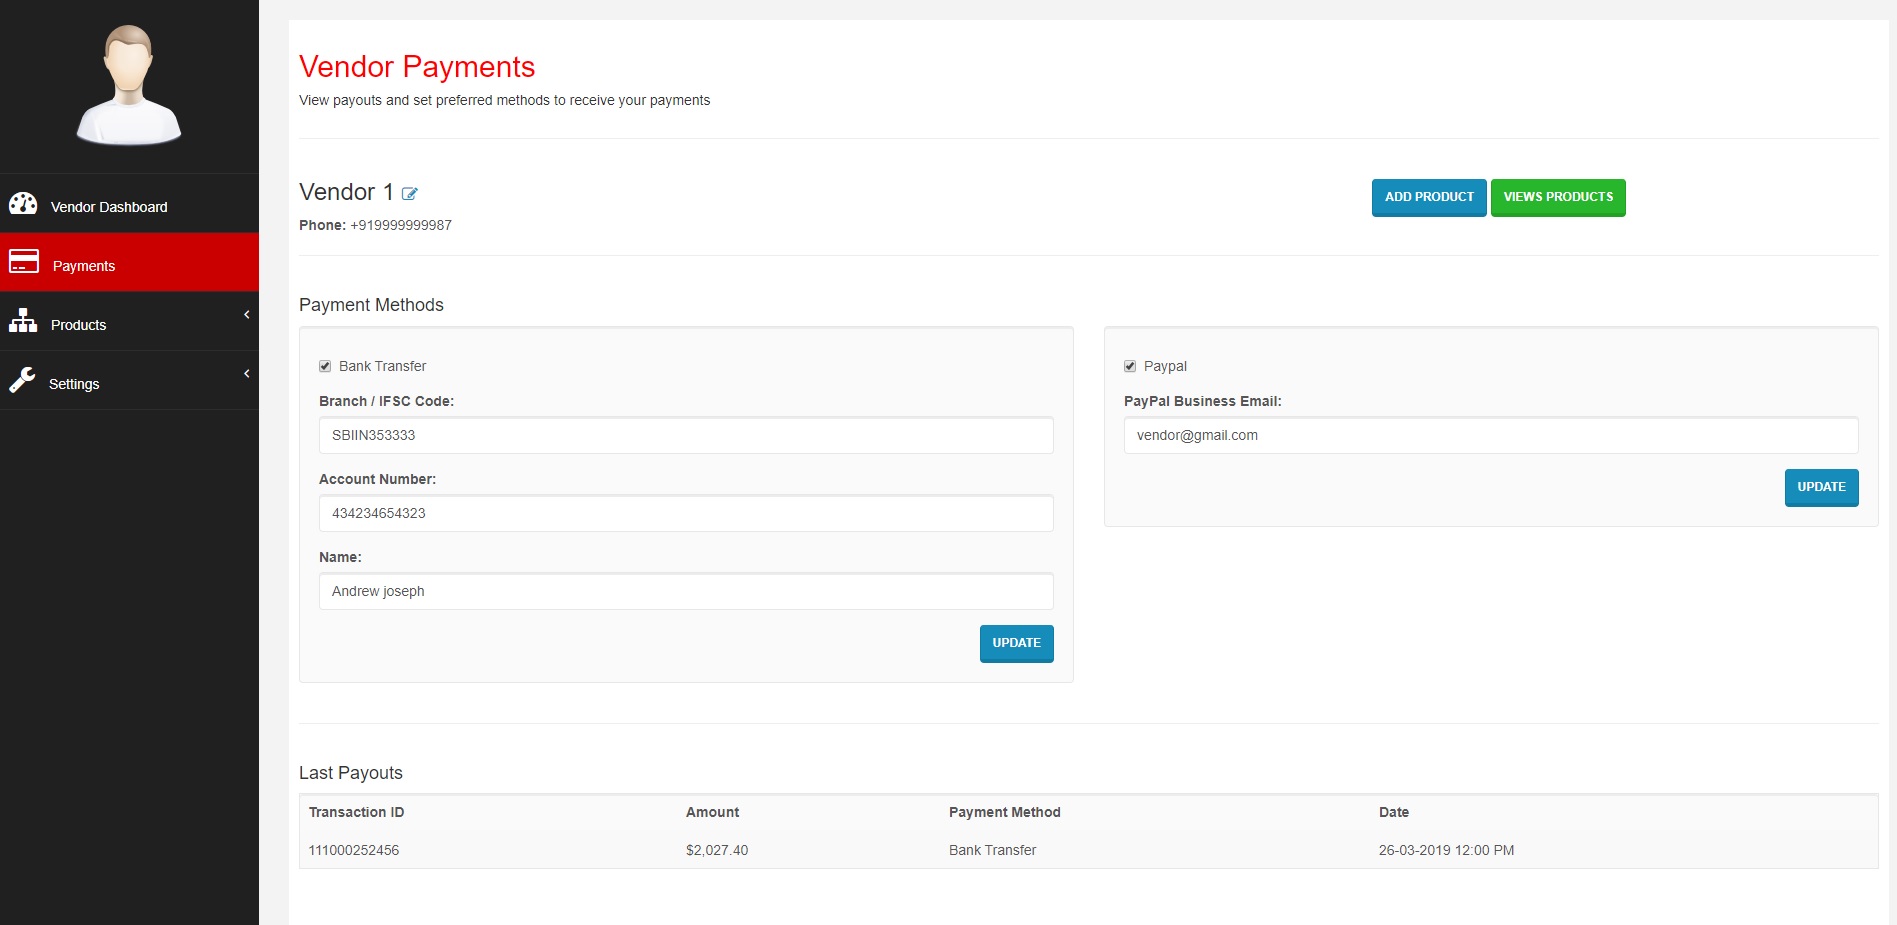
"Bank Transfer" – Enable / Disable Bank Transfer Payment Method.
Also, you will need to provide "Account Number", "Branch Code", "Branch Code Label" and "Name".
There are two ways to collect subscribers. First, you can collect and view subscribers from the application itself. Second, you can use "MailChimp" instead.
Email Template:
You can choose email carrier and customize the subscription confirmation email that will be sent to a user.
If you enable "MailChimp Subscription", then list of subscribers will be managed by "MailChimp". Also, you will need to provide "MailChimp API" and "MailChimp List ID".
You can also configure newsletter/subscriber form title, description, button text, background image and placeholder text.
Moreover, you can import subscribers From CSV File.
For example, "data.csv" is the file you can import which contains:
Email, Status
test1@gmail.com, Confirmed
test2@gmail.com, Pending
If user subscribes from storefront, then confirmation email will be sent. In other words, subscriber's email has to be verified or confirmed.
This allows current user to edit profile. If email is change, then email verification link will be sent to the user and, it has to be verified.
Navigate to 'Manage' > 'Staff' > 'Roles' > 'View Roles'. Here, you can find all the roles that you can assign to your staff. There are certain permissions attached to a role which can be customized.
If you want to add more roles with some access control, then you can go to 'Manage' > 'Staff' > 'Roles' > 'Add Role'. Next, you will need to provide name of role and permissions which are available to this role. Later, you can assign this role to a staff by editing staff's profile.
To add staff to a store, navigate to 'Manage' > 'Staff' > 'Add Staff'. Here, you can add new staff. Here, you can select staff's role, username, email etc.
You can view list of staff with roles in here.
Adding Categories:
You can add a new category from 'Manage' > 'Products' > 'Categories'. Webcart supports multi-level categories. Also, if "Parent Category" is set to "None", then it is a root category. Furthermore, you can select specifications which will allow filtering of products by specification in category page.
Adding Brands:
You can add a new brand from 'Manage' > 'Products' > 'Brands'.
Adding Product's Specifications:
You can add a new specification from 'Manage' > 'Products' > 'Add Specifications'. Also, users can filter products according to specification.
Adding Products
To add a new product to a store, navigate to 'Manage' > 'Products' > 'Add Product'.
For downloadable product, access to this file will be given after payment is done. Also, Downloadable file is required to be in "zip", "rar" or "7z" format.
"Virtual Product" – If you don't check this, then you must provide "Number in Stock" and "Maximum allowed Quantity per Order".
"Featured Image" – can be added at the time of adding a new product.
"More images" – can ALSO be added at the time of adding a new product.
"Maximum allowed Quantity per Order" – User can not add more than this quantity of a product per order.
This allows adding variations of a product like color, size. Also, you can specify additional cost for each new variant. The user will be able to select any of the variant and the price will be set accordingly.
Here, you can add a new vendor by specifying its company name, shop name etc. Also, you need to specify the percentage of amount per sale that this vendor gets. Lastly, you can approve vendor and set its profile status to "Completed".
Here, you can view the list of vendors, their products or manage them
Here, you can view the vendor earnings and vendor payout requests.
Here, you can find all the earnings vendor has made. Vendor has to provide a suitable payment method either PayPal or Bank Transfer. You can transfer the payment to the vendor and add a record with transaction ID.
You can pass order from one shipment to another shipment. Also, a shipment can have shippers which can be selected at the time of adding a shipment. Shippers will be able to see the orders received to their shipments and can forward those orders to next shipement or mark them as delivered.
Staff members of a shipment will be able to view orders which are assignment to their shipment in the dashboard.
Navigate to 'Manage' > 'Orders' > 'Pending Orders'. Here, you can view a list of orders which are not delivered yet.
You can edit any order and mark them as delivered or not delivered. If you mark the order as delivery, an invoice will be created and if you mark order as not delivered, then the product stock will be regained.
Navigate to 'Manage' > 'Orders' > 'View Orders'. Here, you can view all orders and edit orders status.
Navigate to 'Manage' > 'Orders' > 'View Invoices'. Here, you can view all the order invoices.
Navigate to 'Manage' > 'Customers' > 'View Customers'. Here, you can view a list of customers and custom addresses and manage them.
Here, you can edit customers, shipping addresses and view their orders.
Navigate to 'Manage' > 'Deals' > 'Add Deal'. Here, you can add deal and set its priority. Means, if Deal1's priority is 1 and Deal2′ priority is 2, then Deal1 will appear first.
Here, you can view all deals.
Navigate to 'Manage' > 'Orders' > 'Coupons' > 'Add Coupon'. Coupons are applicable to orders. Also, you can set order's amount above which coupon is valid and validity period.
Navigate to 'Manage' > 'Products' > 'Discounts'. Here, you can set discount to products by percentage. Also, you can set its validity period.
Navigate to 'Manage' > 'Report' > 'Product Sales Report'. Here, you can view product sales report in a period. First, select a product, period, group and then click "GET SALES REPORT".
Period available: Today, Yesterday, Last 7 Days, Last 15 Days, Last Month, Last 6 Months, Last Year, Current Month and Current Year.
Group available: Year, Month and Day.
Here, you can view total number of sales for each product.
Navigate to 'Manage' > 'Pages' > 'Add Page'. Here, you can create unlimited pages. Also, this supports images and videos.
Adding Page Sections
There are various page sections available with different positions which you can place in home page, brand page and category page.
Navigate to 'Manage' > 'Deals' > 'Banner'. Here, you can add promotional banners to your store. That is, you can set banners on home page, category page and brand page.
Set Banners On Home Page: Select position which can be from these.
Set Banners On Category Page: Select position which can be from these.
Set Banners On Brand Page: Select position which can be from these.
Navigate to 'Manage' > 'Testimonials' > 'Add Testimonial'. Here, you can add client testimonail. These testimonials will appear on your website in a carousel slider.
Here, you view all testimonials and edit them.
Navigate to 'Settings' > 'Custom CSS' > 'Store Theme Colors'. Here, you can set theme primary color and secondary color.
Navigate to 'Settings' > 'Custom CSS' > 'Store'. If you need to apply any custom CSS, then you can write your CSS in here (without style tag).
Vendor can signup on your website by clicking on Seller tab and provide "Shop Name", "City" etc. The vendors need to be approved by the administrators before they can start adding their products to the store.
After, vendor profile is completed and account is approved by the administrator, vendor can view dashboard and start adding the products. A unique vendor shop URL will be created for each vendor where all the products added by vendor will be listed.
In vendor dashboard, vendor can view its shop details, edit company description, add products, payment methods, view outstanding earnings, amount earned, request for payouts etc. They can view overall summery for outstanding amount, amount earned, amount paid etc.
Navigate to 'Products' > 'View Products'. Here, vendor can see their products name and details like price, category, photo, tax, brand, modal, how much is in stock etc.
Here, vendor can add payments methods and details like Bank transfer and PayPal. Also, they can view all the payouts made to them by the administrators and view trasaction details of each payout.
Here, vendor can view the earnings and request for new payout. The request for payout can be made only when the amount is minimum amount required for vendor payout as set the administrator.
This is the store's signup/login form which can be used by the customers or vendors or administrators.
Here, customers can find their details like order history, shipping addresses or profile settings.
Viewing Orders:
Customers can check the current status and overall status of their orders. Also, they can print invoices. And, for downloadable products, customers can access it only after payment is made.
Shipping Addresses:
Customers can edit or remove their shipping addresses.
Editing Profile:
Customers can edit their profiles. Also, if the email is change, then it has to be verified.
Products can be filtered by category, brand, specification and price range. Also, they can be sorted by price, popularity, ratings and reviews.
Customers can add a product to a cart by specifying its quanity. If product variant is applicable, then customers also have to select product variant.
Add Product to the Shopping Cart
This is the shopping cart. Here, the shipping cost, tax and product prices are shown to the customers.
Selecting Shipping Address
The customer will be prompted to provide a new shipping address or select an existing shipping address at the time of checkout.
Choosing Payment Method
Following payment methods are available:
Cash on Delivery (COD), PayPal, Stripe, Razorpay, Instamojo, PayUmoney / PayUbiz, Paytm, Paystack, Bank Transfer.
Here, you can also apply the coupon code for discount.
Deals can be created from the admin panel. Also, the deals will appear in order according to their priorities.
There are positions where you can place promotional banners in these pages.
Home Page Banners:
Main Slider
Right Side
Below Main Slider - Three Images per row
Below Main Slider - Two Images per row
Below Main Slider - Three Images Layout
Category Page Banners:
Main Slider
Below Main Slider - Three Images per row
Below Main Slider - Two Images per row
Below Main Slider - Three Images Layout
Below Filters
Brand Page Banners:
Main Slider
Below Main Slider - Three Images per row
Below Main Slider - Two Images per row
Below Main Slider - Three Images Layout
Below Filters
You can add any number of custom pages to your store. For example, an "About Us" page.
There are various page sections available in different pages which can be customize from the admin panel.
The newsletter form can be used to collect users email addresses. This form section can be customized through admin panel.
You can customized the following:
- Newsletter Title
- Newsletter Description
- Background Image
- Button Text
- Placeholder Text
All the client testimonails which are added by the administrators will appear at the bottom of your home page.
If you face any trouble OR required any assistance to set up and configure web-cart, please post your query on Support Forum. We will try our best to resolve our query on the forum.
And your suggestions for more features and improvements for our plugin is really appreciated.
Thanks for reading this documentation.